Spageet’s Foobar2000 Setup
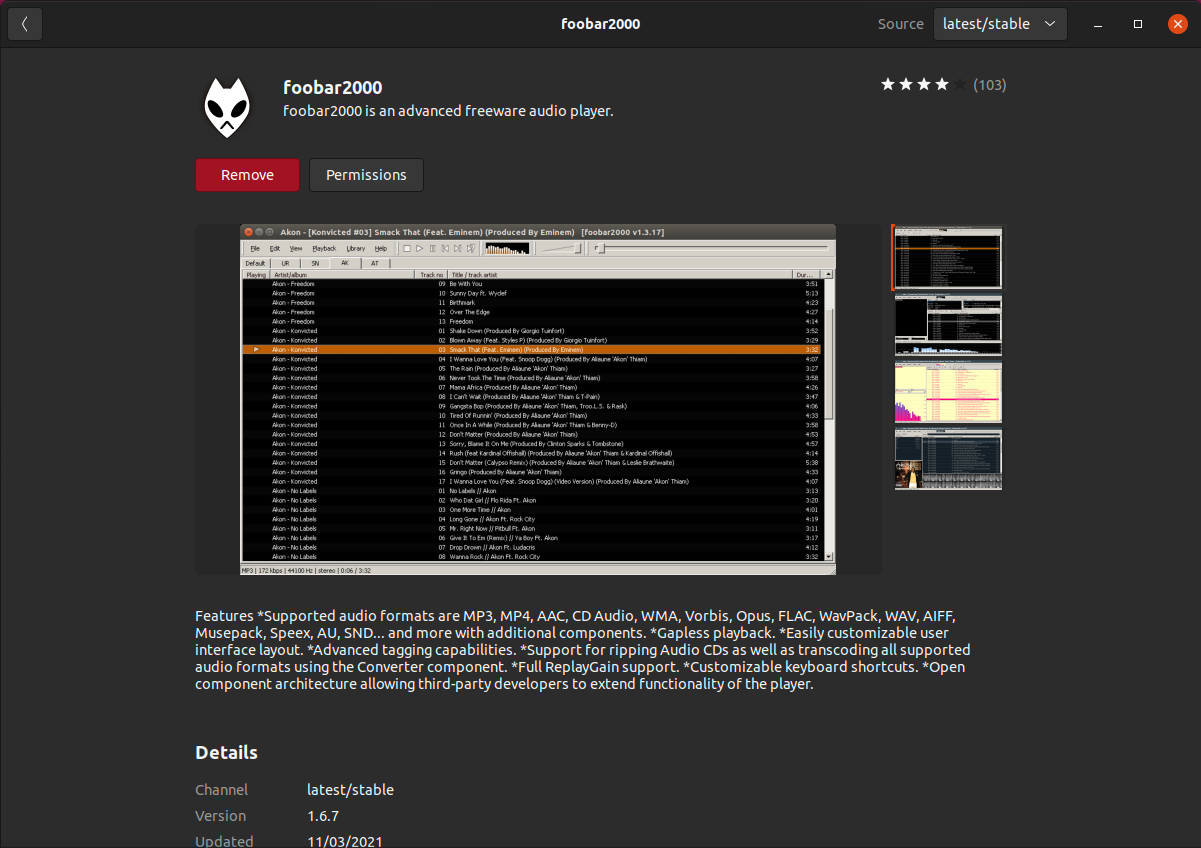
I spun up a copy of Ubuntu 20.04.3 in Oracle VM VirtualBox. Before I make the jump to switching my personal machine over to a Linux distro, I need to do a bit more testing. I did, discover Snapcraft and “snaps”. Snapcraft is a package and deployment system developed by Canonical to be cross-platform and dependency free. Platform specific applications like Foobar2000 have been added and allows them to be run on Linux. Snaps run in a sandbox with limited access to the host machine. Foobar2000 has been my preferred music player for almost 10 years. I was worried because I was aware that it was only available on the Windows platform. To my surprise, it is available as a snap package! With that, I decided to setup my preferred configuration on my Ubuntu 20.04.3 VM.
Ubuntu Snaps
On Ubuntu 20.04.3, you can find snaps in the default package manager Ubuntu Software.
Interface Customization
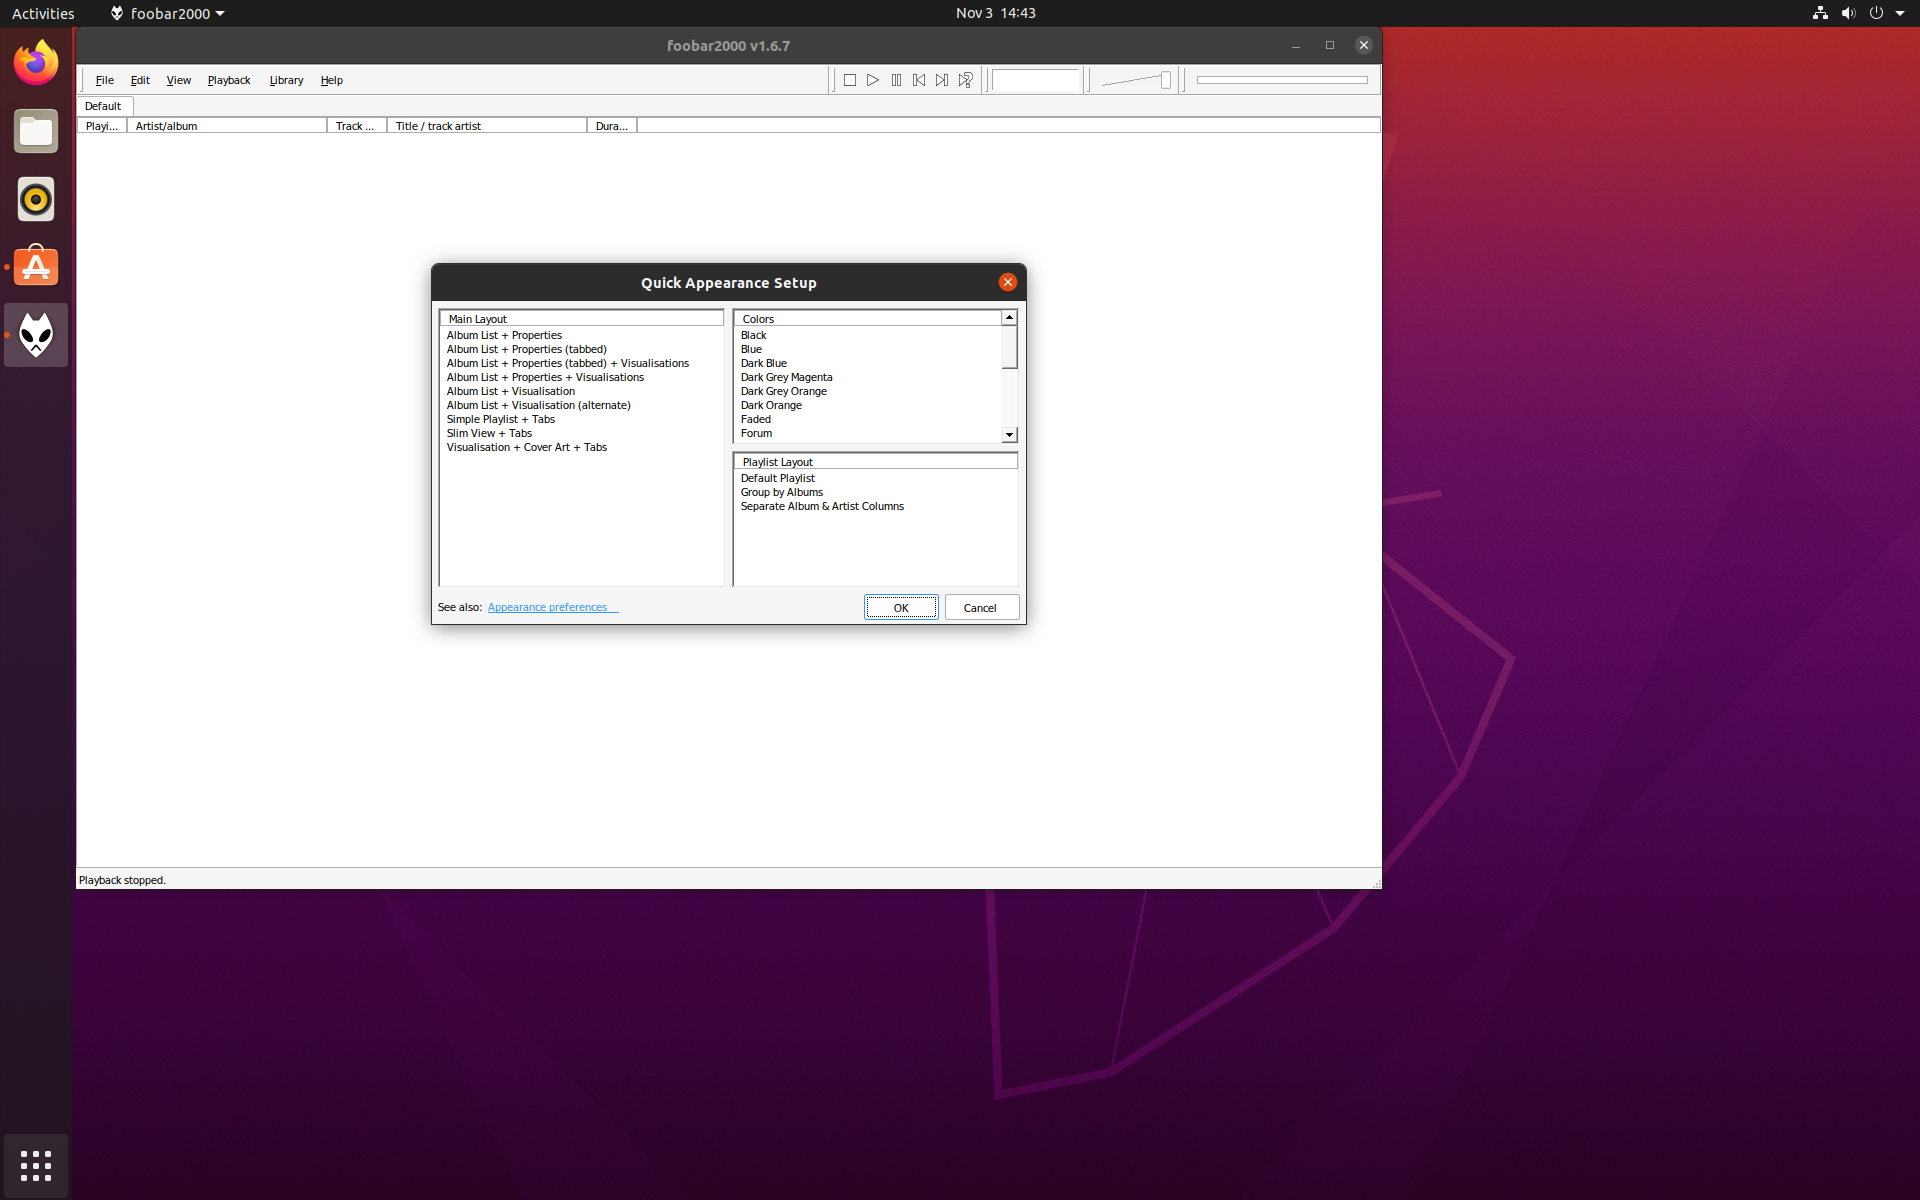
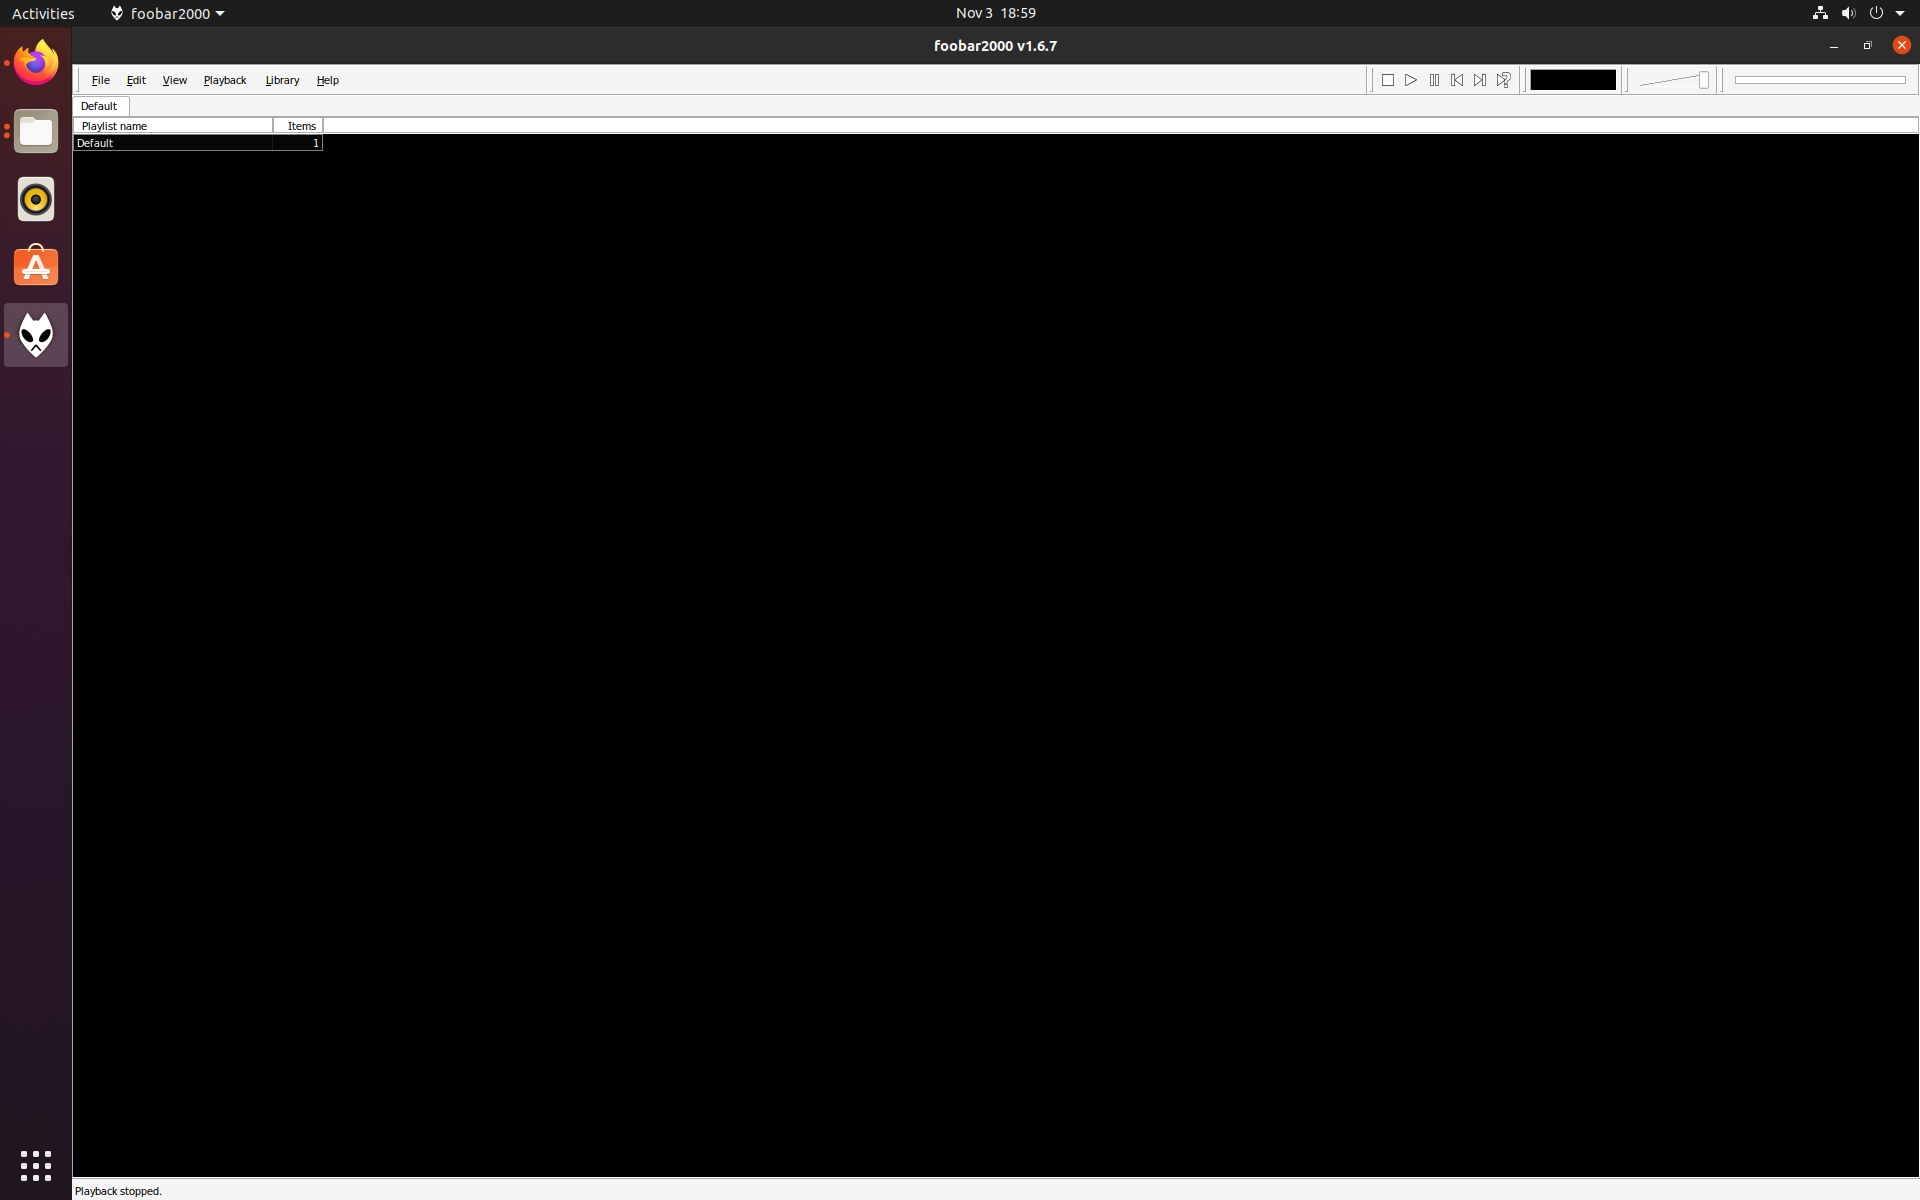
Once installed, I selected one of the default interfaces (we are going to be changing this in just a bit).
Component Installation
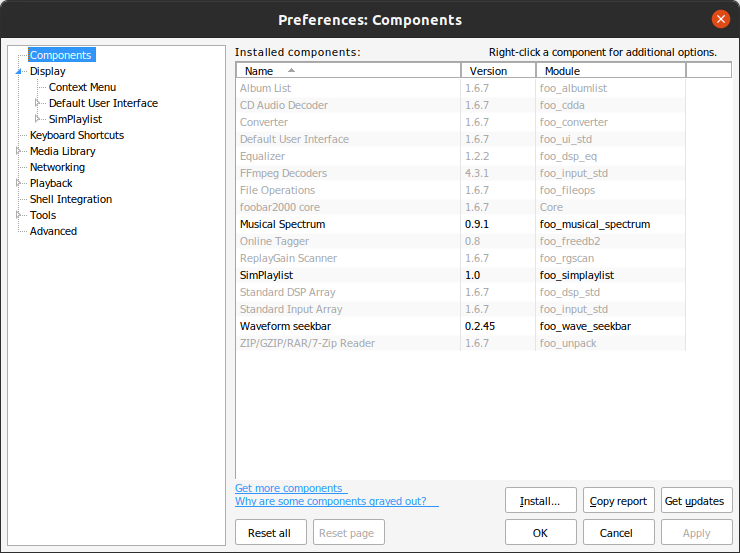
My first step was to get my three must have components. I wasn’t sure if they’d install without issue. I was most worried about Waveform Seekbar. It requires DirectX (spoiler alert, it doesn’t) to function.
SimPlaylist: A great playlist component that can group music in different ways.
Musical Spectrum: A plugin that creates a nice and accurate visualizer. It just looks cool.
Waveform Seekbar: A really useful seekbar!
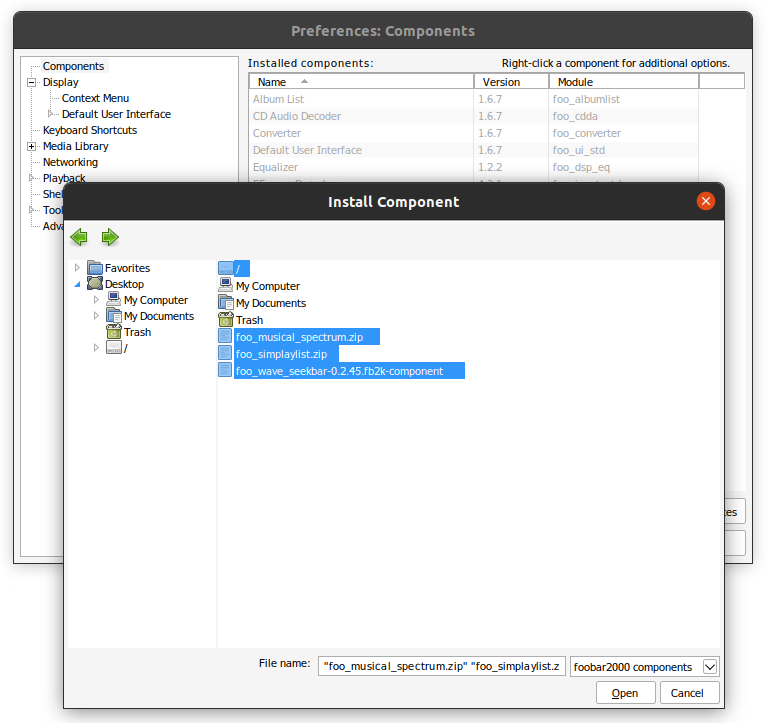
To install Foobar2000 components go to File>Preferences>Components and click Install….
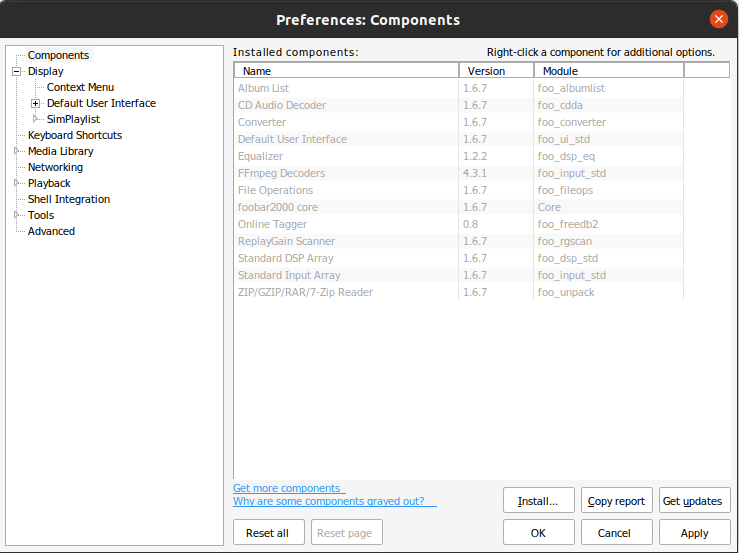
Locate the downloaded components and select the ones you’d like to install. They come in .zip and .fb2k-component, but they all install the same. When installed natively on Windows, .fb2k-component files can be double-clicked and installed. This does not work on Ubuntu.
Once added, click apply and you might be prompted to restart Foobar2000 (depending on the components that were installed).
Preferences
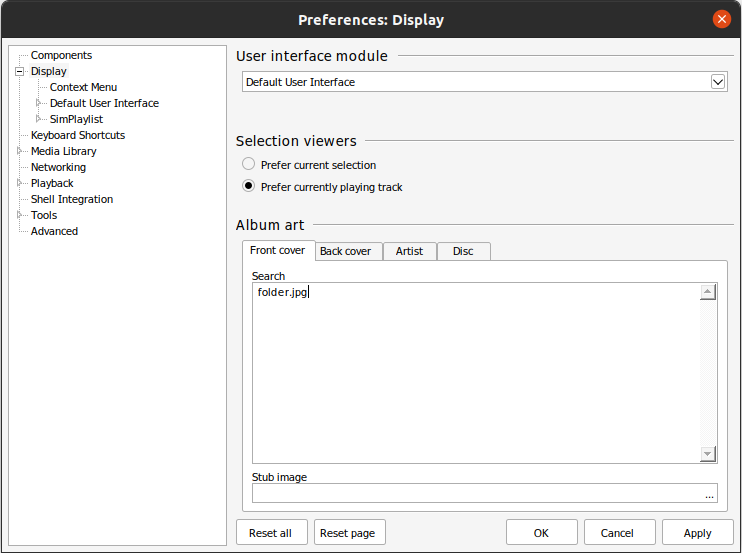
I change the Selection viewers to Prefer current playing track. This will affect what album art is showing when playing music. It will change the album art as new tracks begin to play.
Under Album art, I remove all entries but folder.jpg. All my album art is named folder.jpg and I don’t have Back cover, Artist, or Disc.
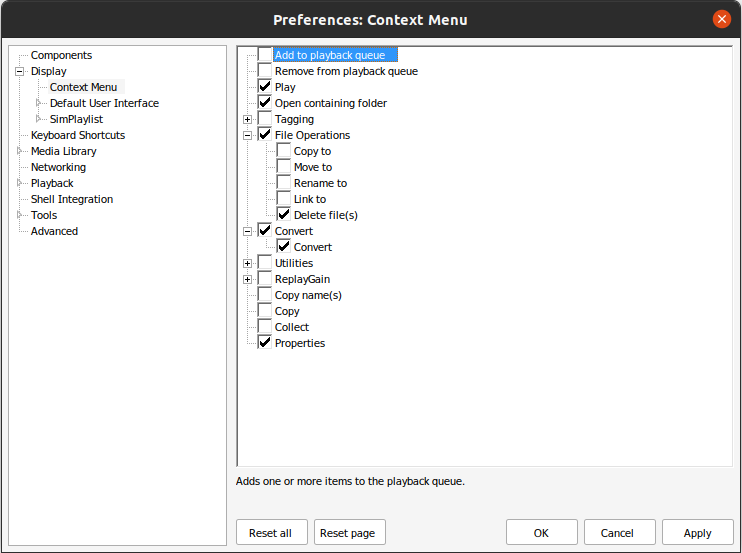
I like to simplify the Context Menu (Right-clicking on music in Foobar2000). I remove a lot of the extra features.
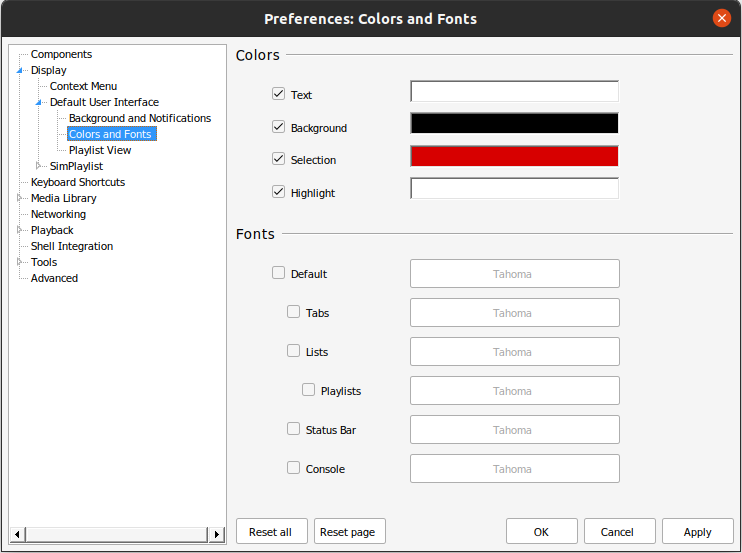
Colors and Fonts defines the main colors of Foobar2000. I prefer a dark background with lighter text. For Foobar2000 I enjoy a red accent.
Note: If you do choose a dark Background, make sure to adjust your Text and Highlight accordingly. My color values are as follows.
Text: Basic Colors: White
Background: Basic Colors: Black
Selection: Basic Colors: Red with Lum=100
Highlight: Basic Colors: White
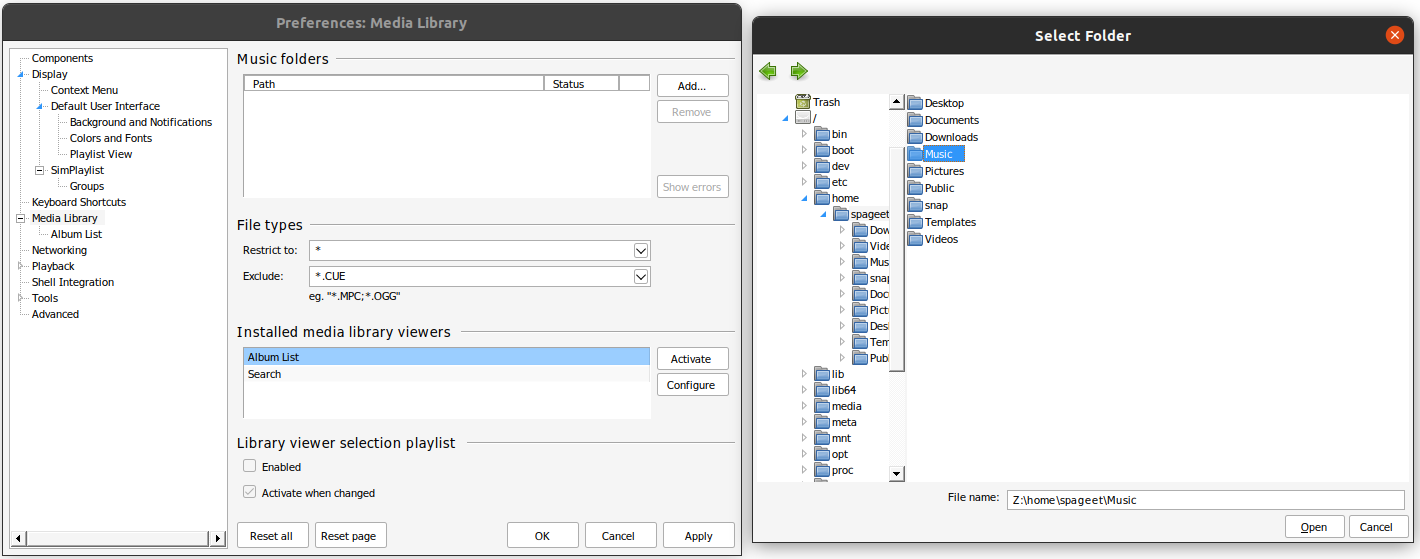
Let’s tell Foobar2000 where our music is. I’ve copied a few artists into Ubuntu’s music folder for testing. It was a bit tricky to select these. I needed to select the folder I wanted in the right pane before it would populate the File name: section below.
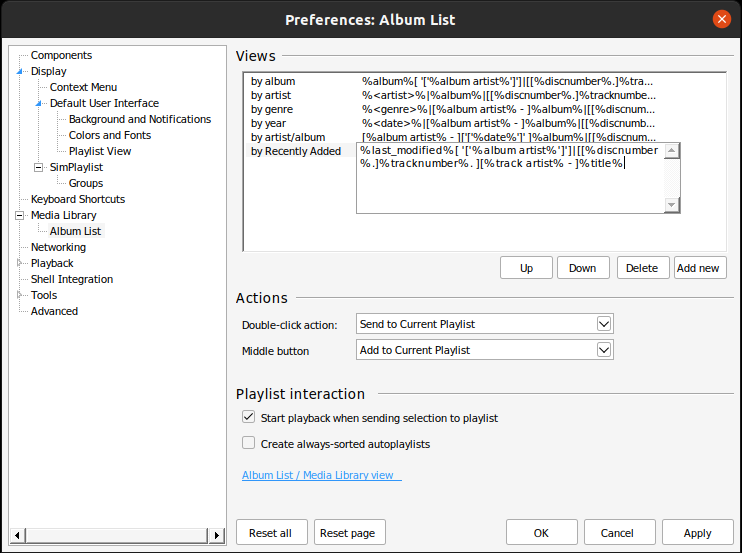
Under Views I like to add Recently Added, I snagged this view from someone on a forum somewhere. Ninety-Nine percent of the time I use by folder structure or by Recently Added. By folder structure is not shown in the preferences, but it shows up regardless.
%last_modified%[ '['%album artist%']']|[[%discnumber%.]%tracknumber%. ][%track artist% - ]%title%
My double-click action is Send to Current Playlist this will replace the current playlist with the item selected. Middle button adds items to the current playlist. I generally use drag-and-drop to add items to playlists.
With that, we’ve configured all the Foobar2000 specific preferences.
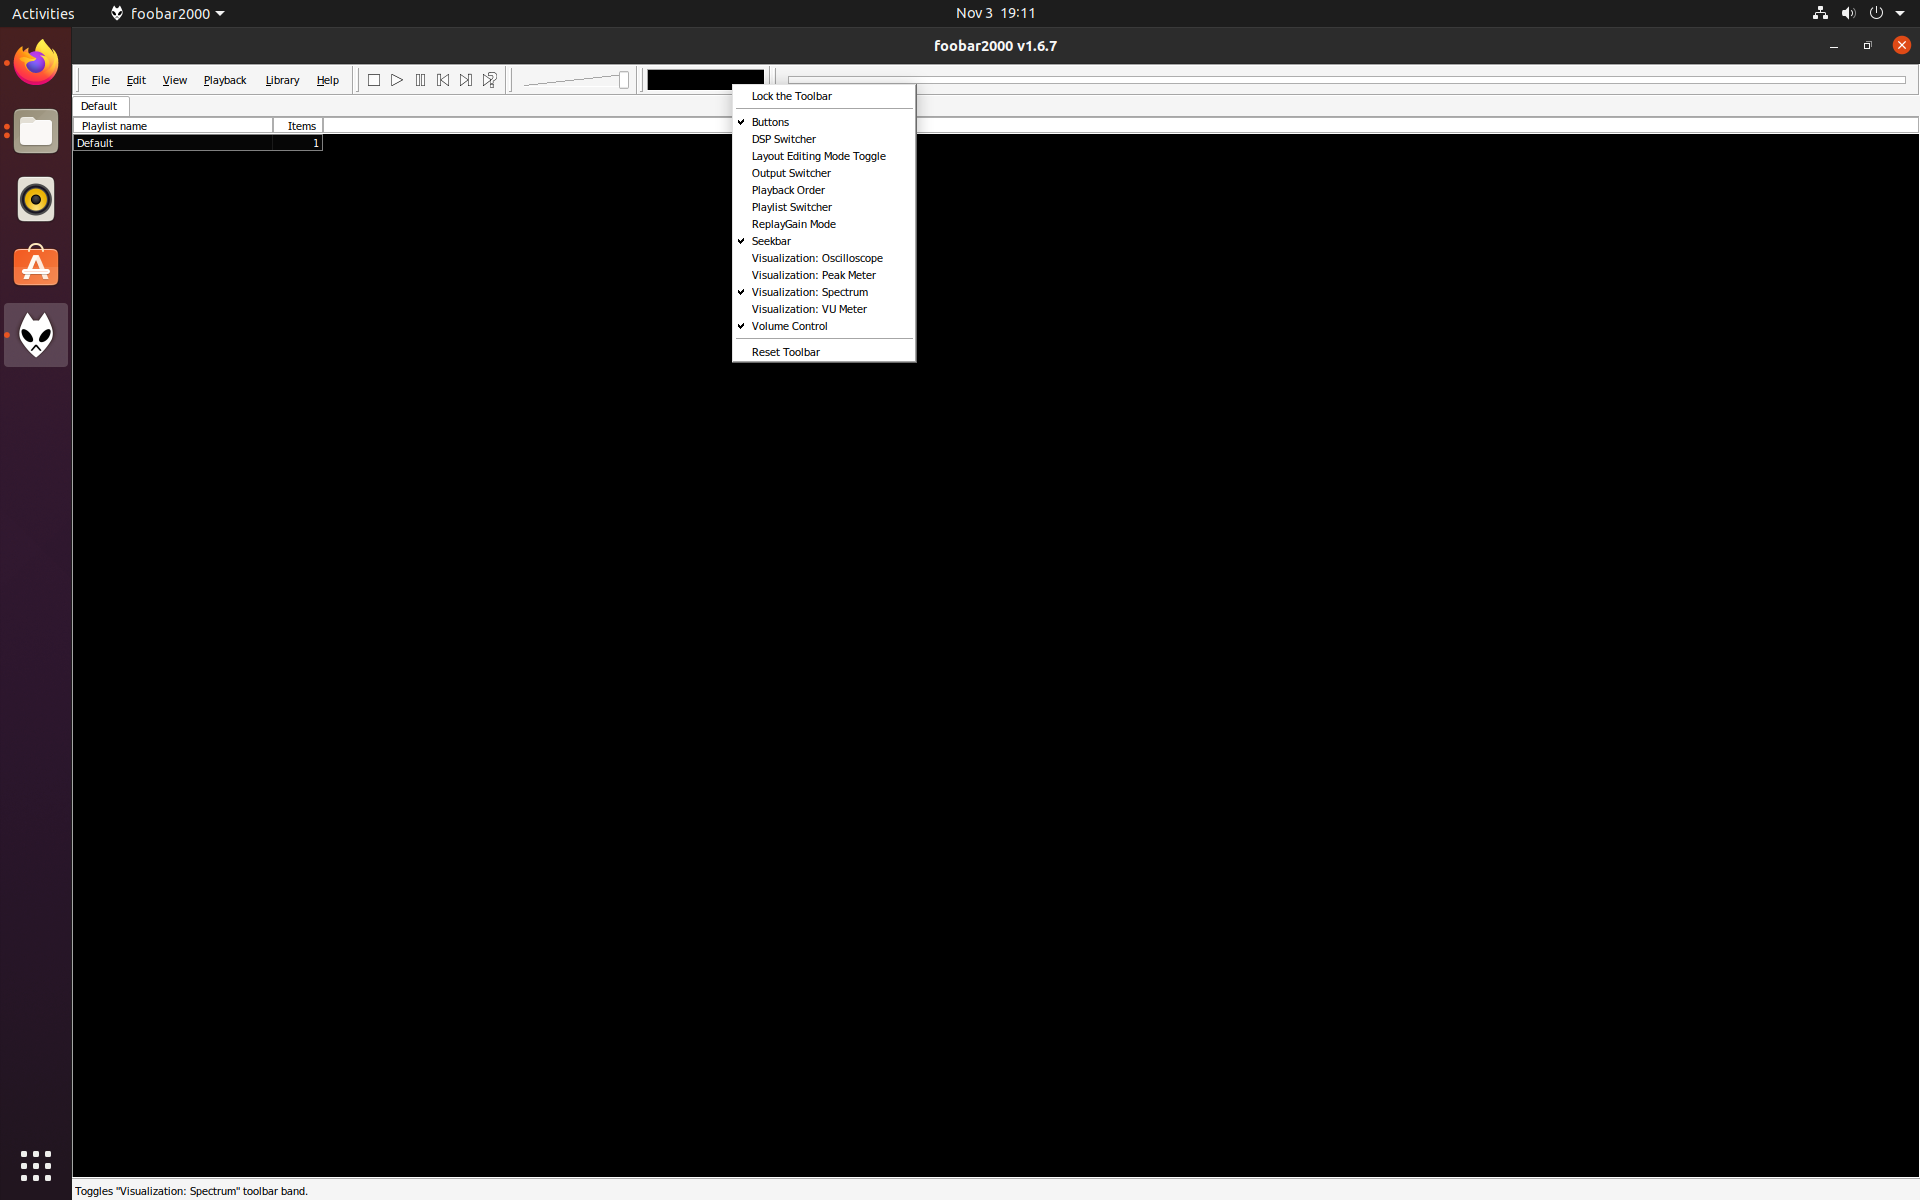
Before we get into the heavy lifting of UI modification, Let’s start with the items on the menu bar. I like to collapse the menu items, playback, volume, and builtin seek bar all onto the same line. I also right-click and remove the Visualization: Spectrum. Waste of space!
Layout Editing
Enable layout editing View>Layout>Enable layout editing mode (Turn this off once you’re done with configuration).

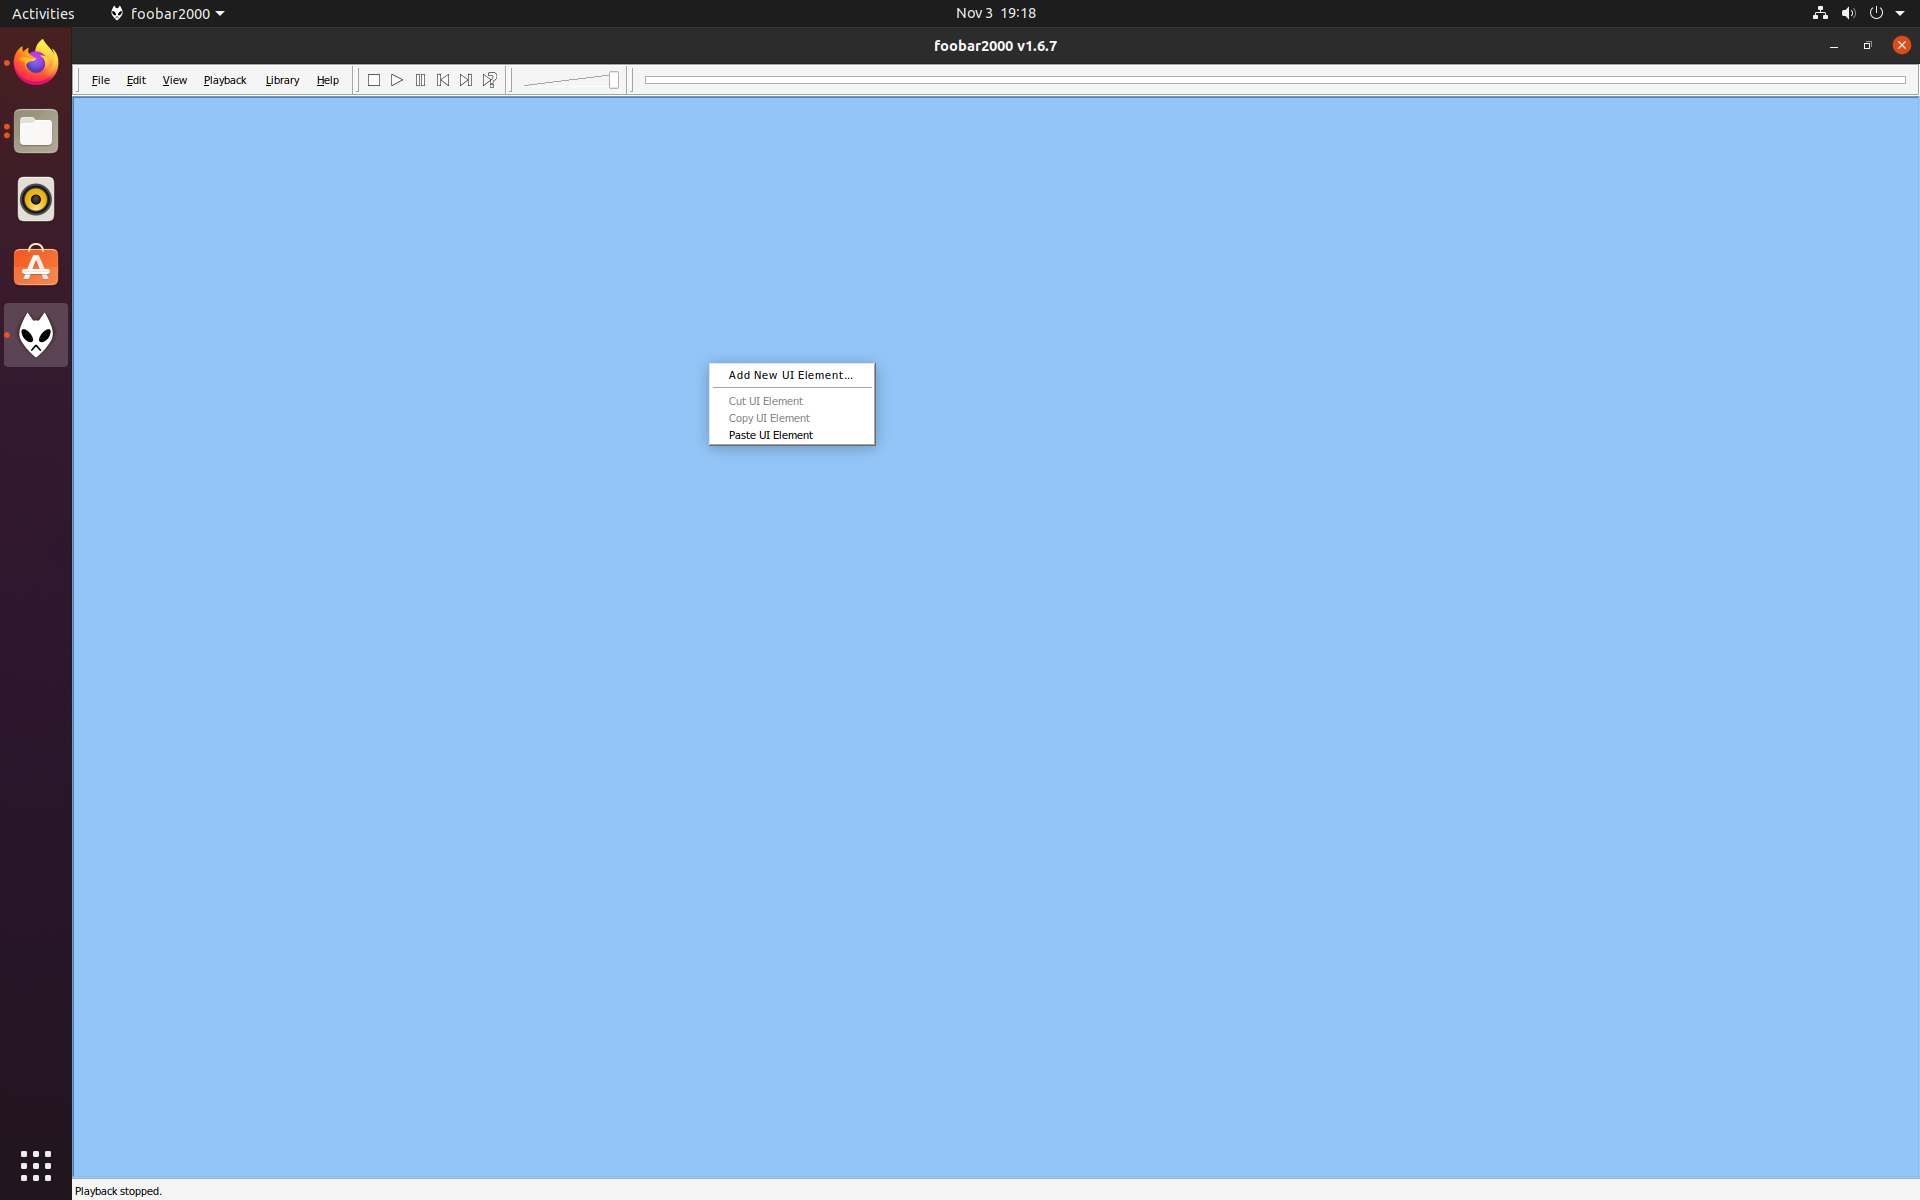
Right-click and Cut UI Element until there are no elements left. Fresh Start!
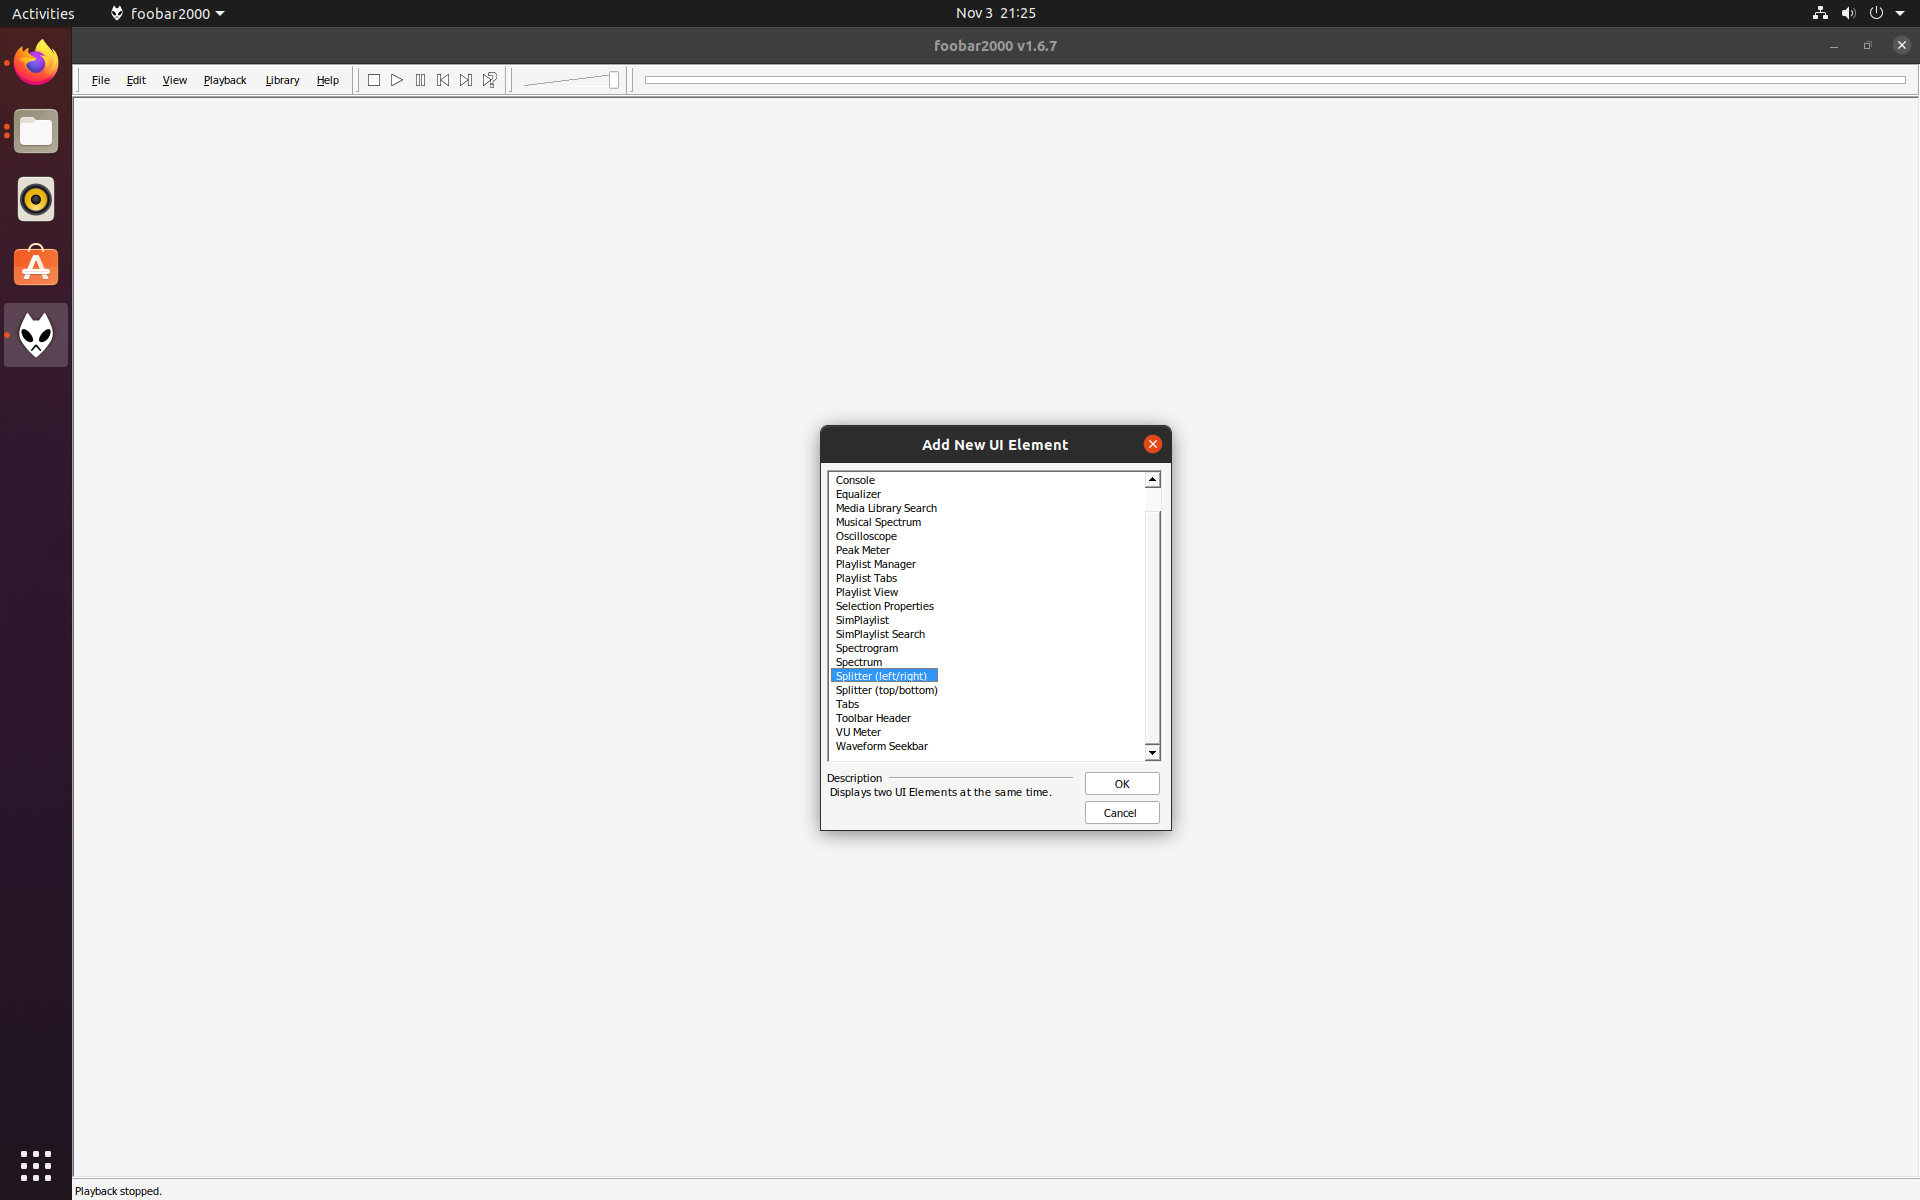
Next I will be creating the splits that will define the UI’s structure with the UI element Splitter. There are two options, one to make a vertical split (left/right) and a horizontal split (top/bottom). Once you split part of the UI, you can split that UI again, but you can’t go back and change a split after the fact without deleting back to that original split. So create your big splits first.
I had some issues moving the splits around. It might have been due to running this in a VM. I also connected to this VM machine with RDP and still had the same issue. So, it could also be a snap issue. It seems Foobar2000’s splitter selection is very narrow and the mouse can jump over the area of selection. I was able to get everything setup by moving other splitters around. Doing this causes the rest to shift. Once they shifted, I was able to move them to the appropriate place.
I took a screenshot after I had added all the splits and UI elements. Each component is labeled. I will start configuring these components left to right, top to bottom.

Album List
There isn’t anything we necessarily need to configure for this component, but I wanted to comment on folder structure. List by folder structure, is defined by folder/directory structure. If you plan to use the by folder structure view and you want your albums to be ordered by year and not by album name, you will need to add the album release year in the album folder. This will also affect SimPlaylist’s order.
..\Music\Artist\Artist – [YEAR] Album\01 – Track.flac
SimPlaylist
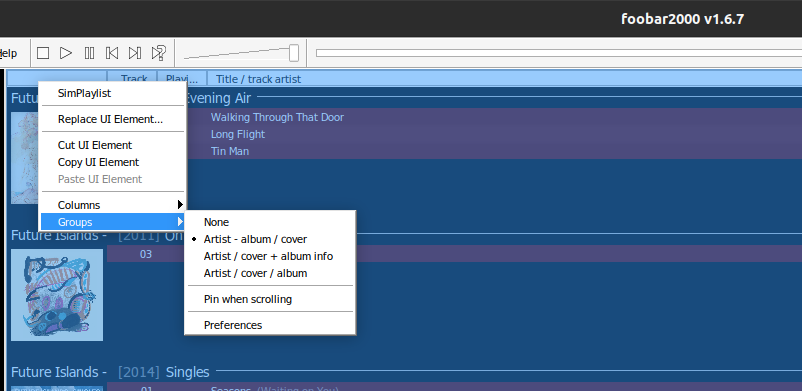
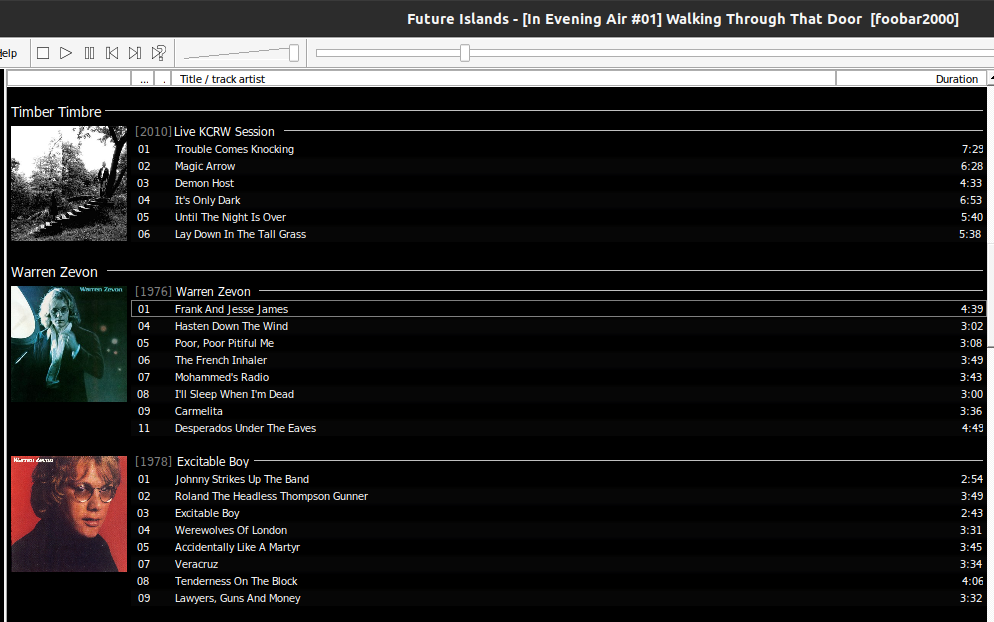
Right-click on SimPlaylist and under Groups, I select Artist/cover/album.
I also resize the Track and Playing column down to a very narrow margin. I make the group column larger (the one that contains the album art).
Next, I will be adding two new columns. Codec, which is already defined, and Bitrate which will need to be added. Right-click on the SimPlaylist and under Columns, add Codec, and then click on Custom….
Here I will add a new column as seen below. For help with syntax on creating patterns… in Windows there should be a link listed on this Preferences page, under Linux I did not see it listed. Under linux, using the Foobar2000 snap, it is located here:
/home/username/snap/foobar2000/current/foobar2000/doc/titleformat_help.html
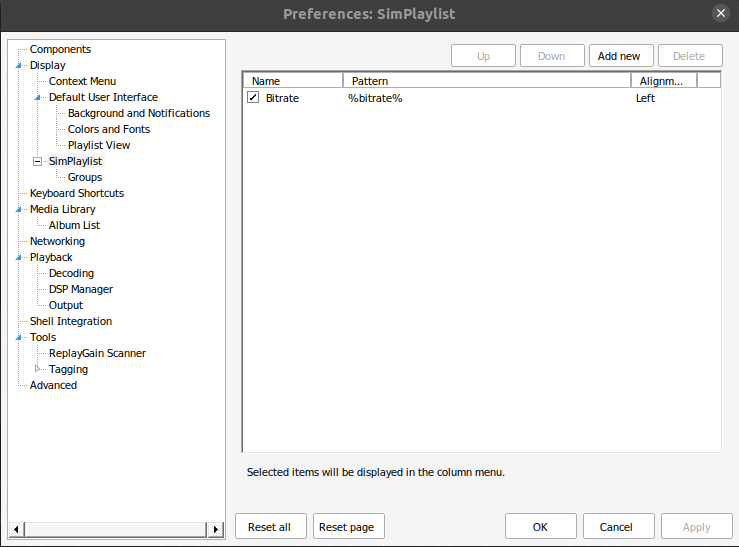
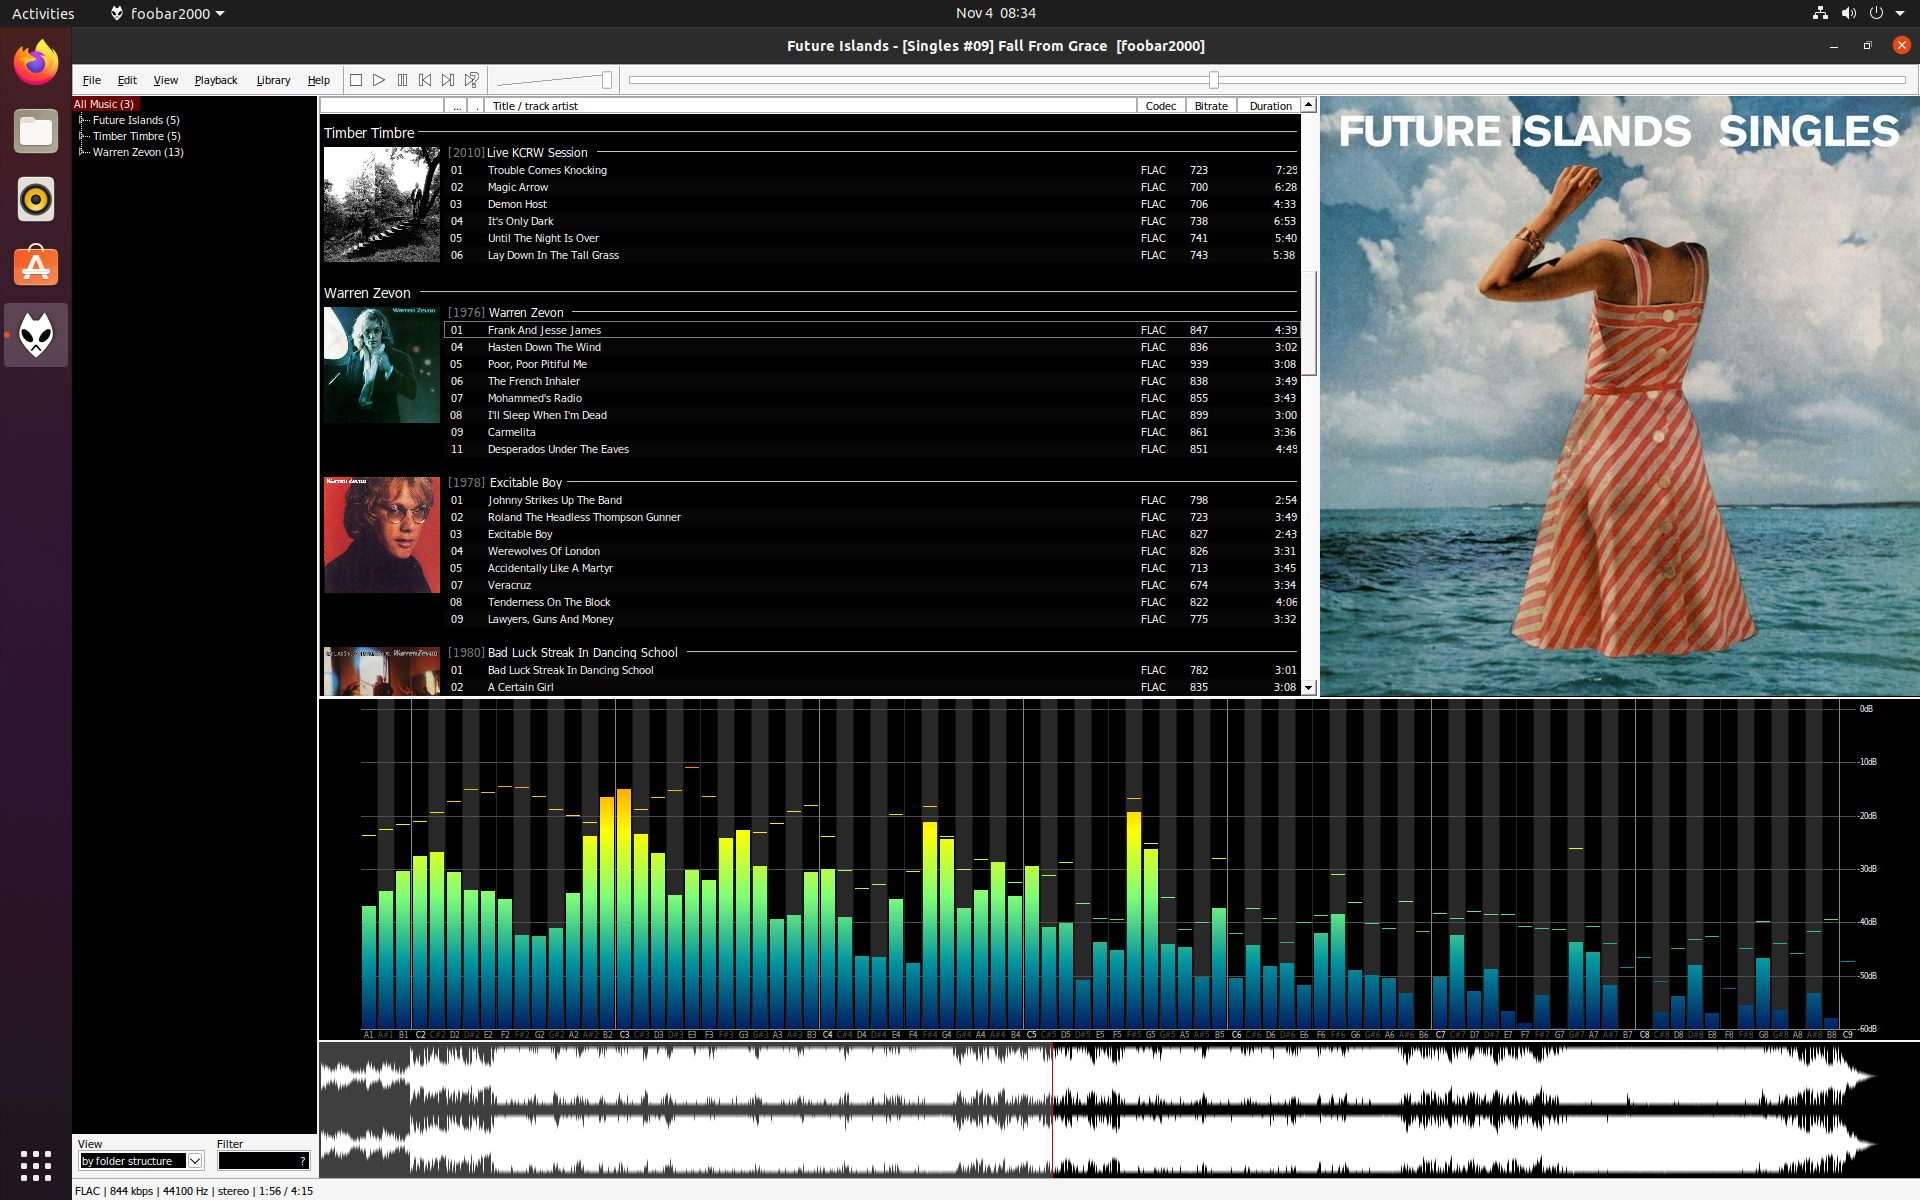
After I added my two extra columns, and tweaked the size of those columns, this was my final SimPlaylist result.
Musical Spectrum
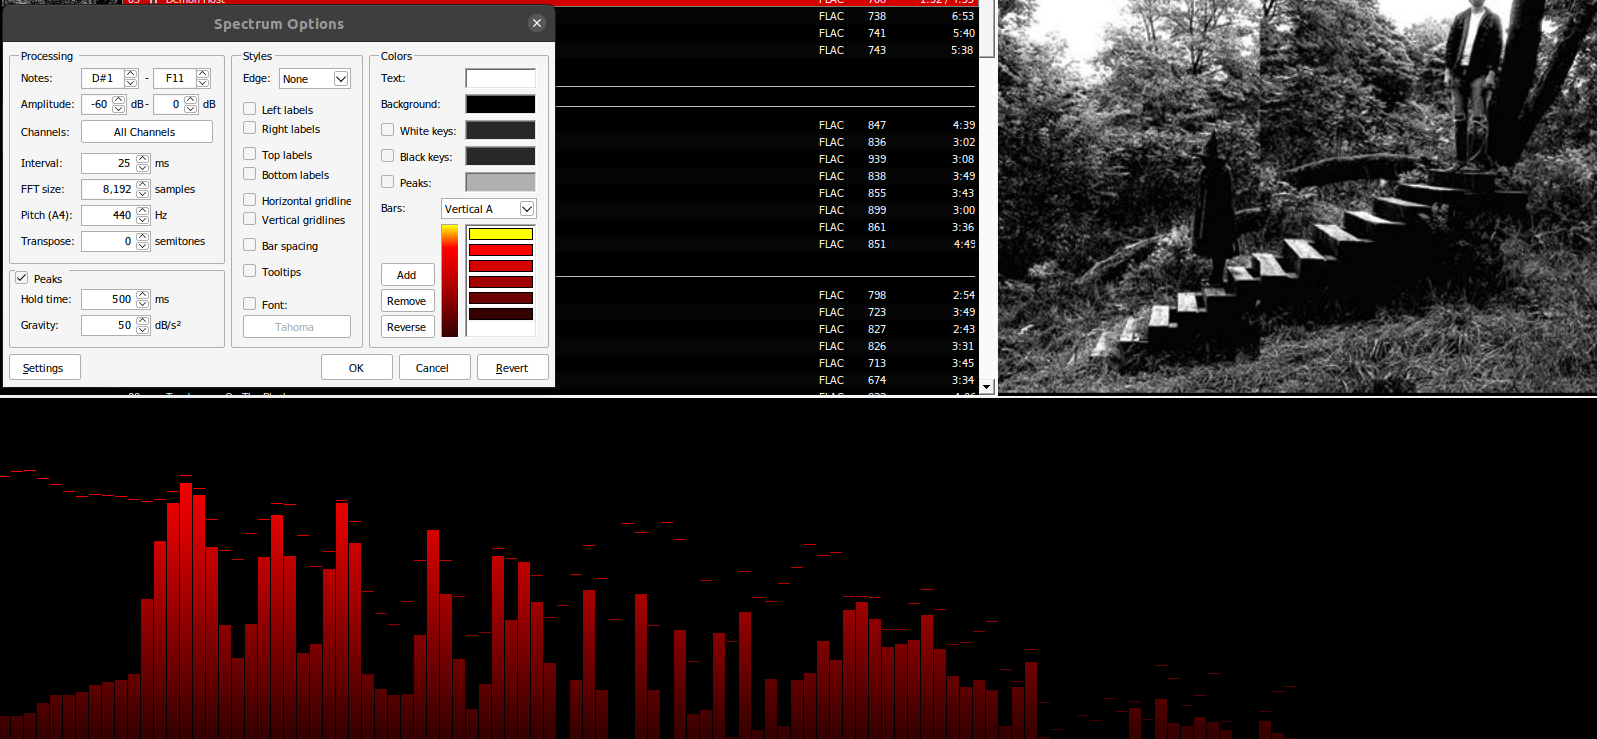
I adjusted the range of frequency that is displayed by adjusting the Notes range. You can change this depending on what frequencies you’d like to display. Additionally, you might need to tweak the range depending on your windows size to get everything looking nice. Then under Styles, I unchecked all the labels, grid lines, and other UI items. Under Bars I selected basic color yellow for the top and basic color red for the rest (reducing luminance by 25 on each red color until I get a nice red to dark red gradient).
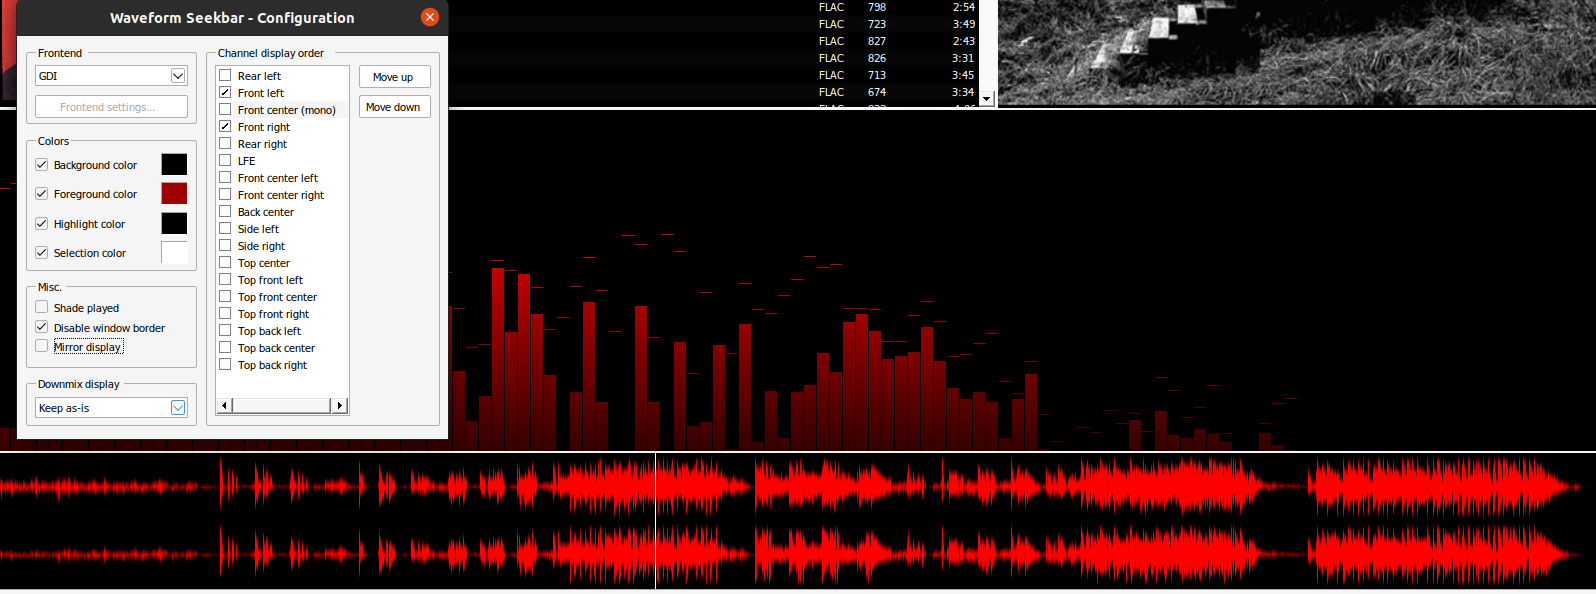
Waveform Seeker
The final component we will configure is Waveform Seekbar. Surprise! I guess by default, this component runs as GDI not DirectX. I might be wrong on this, but it worked fineunder GDI. So GDI it will be! First, I changed the colors, Background to basic color black, Forground to basic color red with luminance set to 75, and Selection to basic color white. Uncheck Shade played under Misc, and finally, for stereo music select channel Front left and Front right.
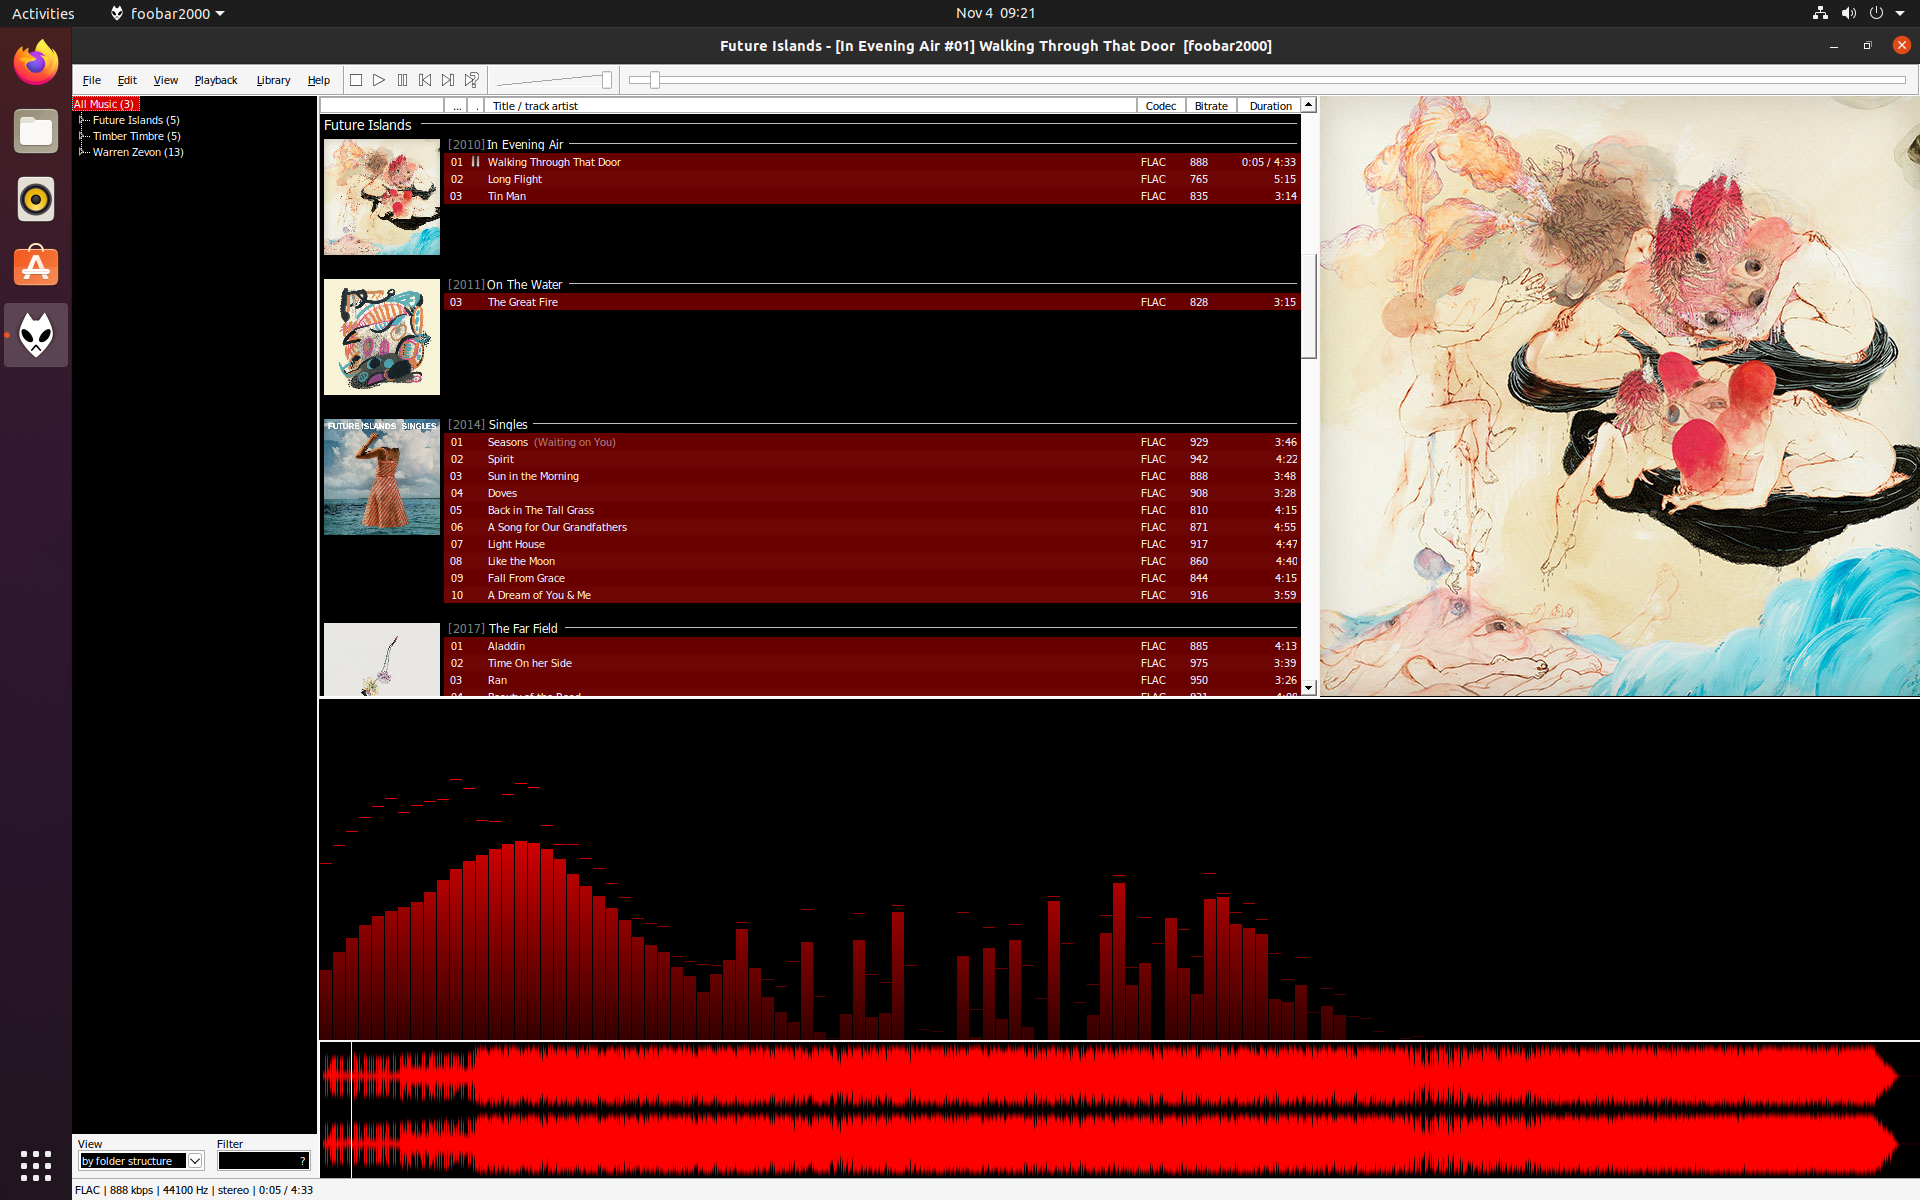
Conclusion
Here is the final configuration. As you can see, Foobar2000 is very customizable and the sky is the limit. This is why I enjoy using Foobar2000. It is highly customizable, and it is still very lightweight.